Work Portfolio

Placing a private property sign
Placing a privately owned sign is generally permitted and is a way of letting others know that a particular area is privately owned. Check Local Regulations: Before installing any board, check the regulations specific to your region or county to ensure you are complying with local laws. Proper Location: The sign should be placed in a conspicuous location, such as near the property entrance or in an area where it will be easily noticed by visitors. Ownership and maintenance: Make sure the sign is installed within your property boundaries and does not encroach on others' property. Additional Notices: Depending on your location and applicable laws, you may also need to display other notices such as "Do Not Enter Without Permission", "Camera Surveillance" or "Guard Dogs Present". I recommend consulting local authorities or a professional who specializes in real estate law for specific guidance based on your location and individual circumstances.
View image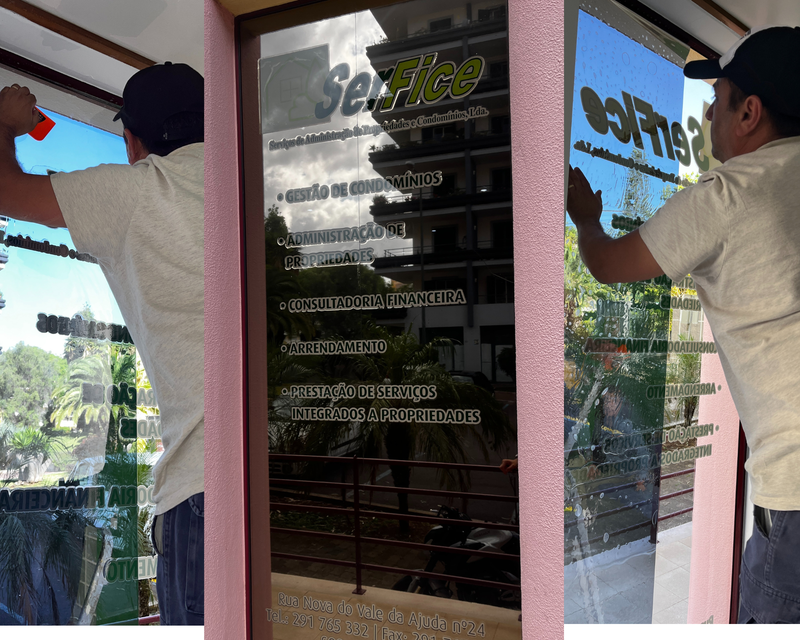
Placing a Mirrored Film on the Glasses
Putting a mirror film on your windows is a relatively simple process. But it requires care and skill to get a quality result. There are several options of mirrored film available in the market. Choose a quality film that meets your needs. Before applying the film, be sure to thoroughly clean the windows. Use a sharp knife to cut the excess film around the edges of the glass. Let the film dry completely before moving or touching the glass. If you are not comfortable going through the process yourself, it is recommended that you seek the help of a professional who specializes in window film installation.
View image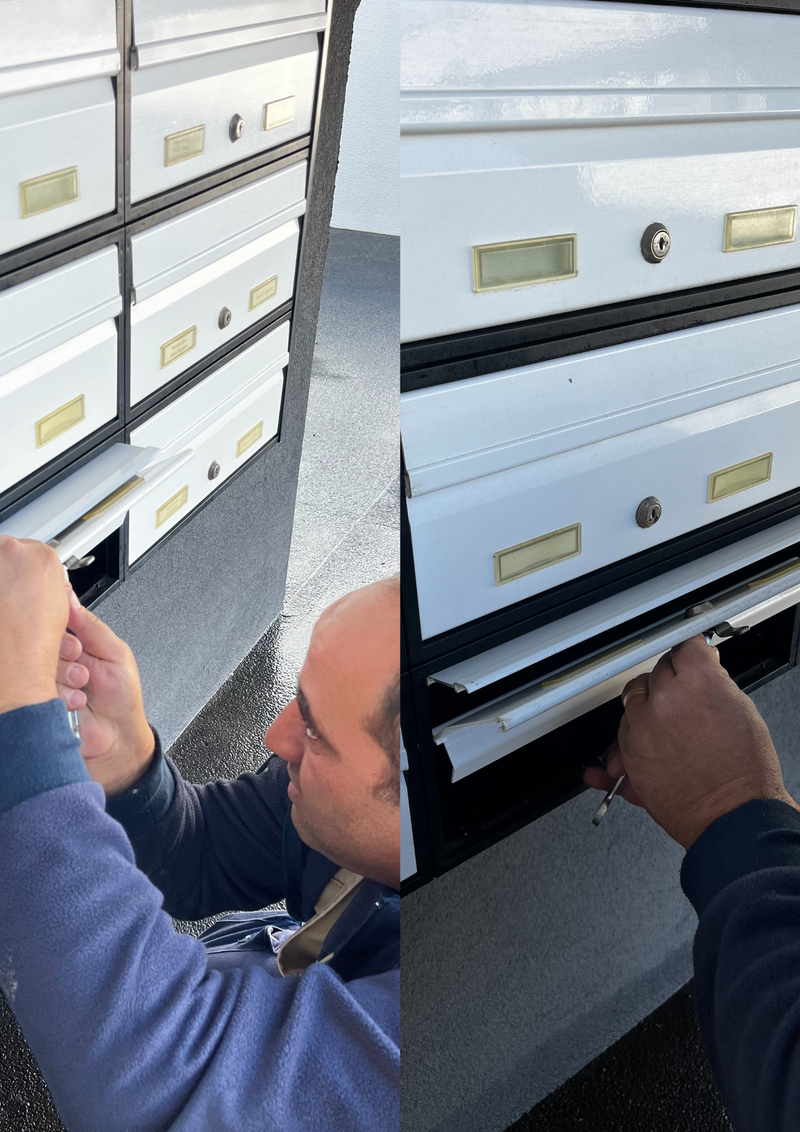
Repair and cylinder change of a mailbox
To repair and place a cylinder in a mailbox, you can follow these steps: Purchase a new cylinder to replace the old one or to install in the mailbox if you don't already have one. Remove the old mailbox cylinder, usually this involves removing a few screws or using a key to unlock the cylinder. Carefully clean the area around the cylinder bore to remove any accumulated debris or dirt. Insert the new cylinder into the mailbox and secure it in place with the screws provided. Make sure the new cylinder is flat and secure in the mailbox. Test the new cylinder by inserting a key and turning it to ensure it is working properly. If the new cylinder includes a new set of keys, make sure all keys work correctly. Finally, test the mailbox to ensure that it is working properly, including opening and closing the cylinder and receiving mail. If you are not comfortable doing these steps yourself, you may want to consider hiring a professional to help with your mailbox cylinder installation and repair.
View image
Repair of a garage door and installation of springs
If you need to repair a garage door and fit springs, the first thing to do is identify the type of springs your door needs. There are two types of springs for garage doors: extension and torsion. To repair the door, you will need to check the door or springs for any visible damage. If so, it is important to repair or replace the damaged parts before installing the new springs. For spring installation, it is recommended that you call a professional to do the job. An experienced garage door technician will have the necessary tools and knowledge to install springs safely and accurately. They can also ensure that the door is properly aligned and working properly after the springs are installed.
View image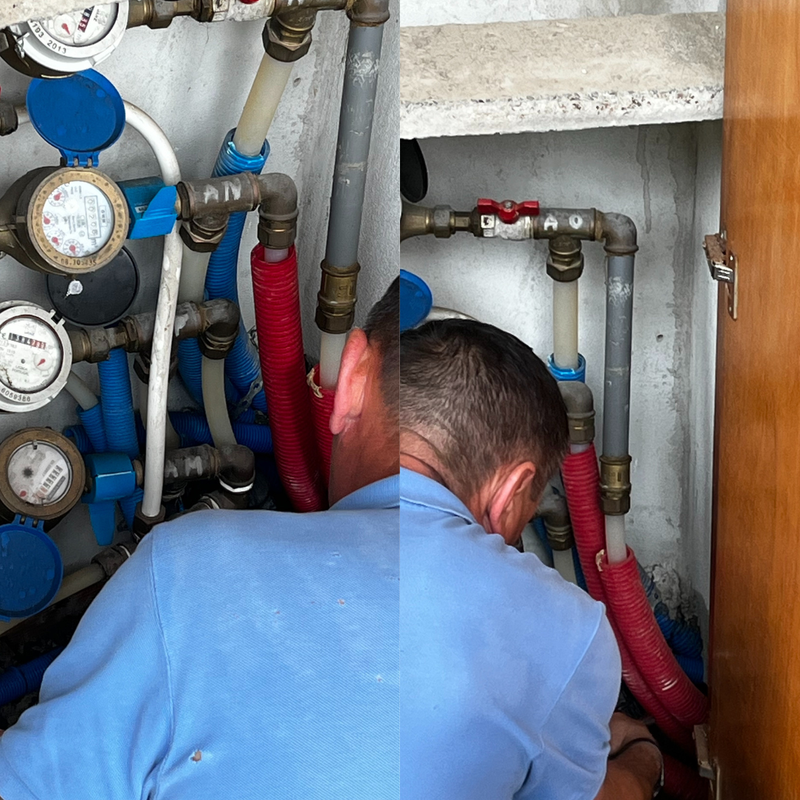
Repair of a water pipe
Water pipe repairs depend on the extent of damage to the pipe. If it's a small leak, you can try patching the pipe with duct tape or caulk. However, if the damage is extensive, it may be necessary to replace the faulty tube. Here are some general steps you can take to fix a water pipe: --Turn off the water Be sure to turn off the water source before starting the pipe repair. --Locate damage: Locate the exact location of leaks in pipes. --Clean the area: Cleanse the area around the lesion to remove any dirt or debris. -- Duct repair If the damage is minor You can try to fix it with duct tape or caulk. Follow the manufacturer's instructions carefully. --Replace Duct – If the damage is too extensive to repair, you will need to replace the damaged duct. To do this, you will need to trim the faulty pipe and install a new one. --Test the repair After the repair is complete, open the water source and check for leaks. Remember, if you're not comfortable doing the repair yourself, it's best to hire a professional.
View image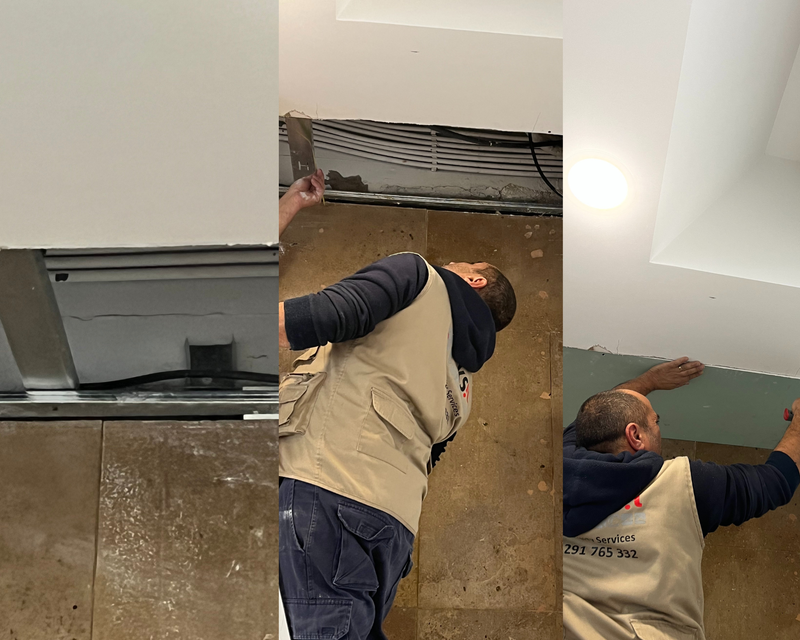
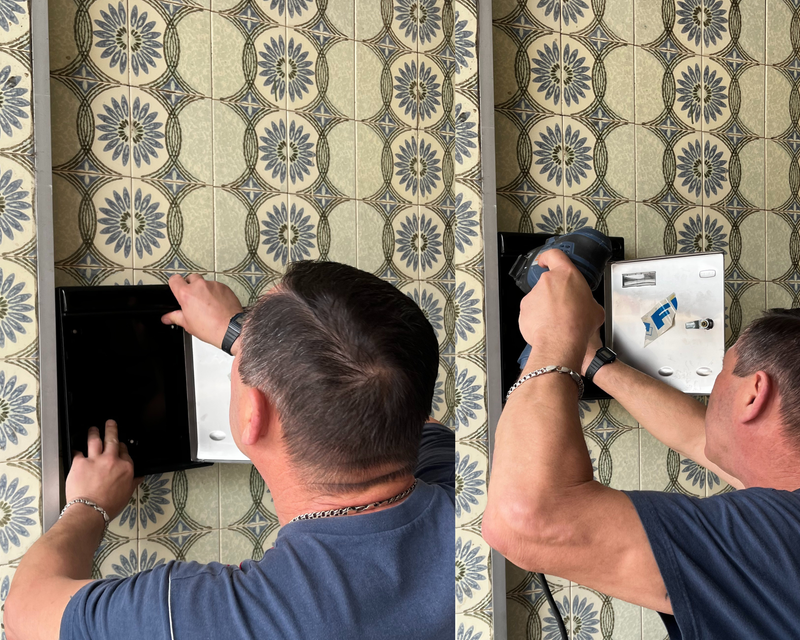
Repair of a ceiling and placement of a trapdoor
Maintaining a roof is an important task to ensure the safety and durability of the structure. A few steps is required to perform damage repair and cleanup. To clean the ceiling, use a damp cloth with water and neutral soap and use paint suitable for ceilings. To place a trapdoor, you need to follow these steps. Identify the location where the trapdoor will be placed. Make sure the location is secure and there are no support structures or electrical wiring in the location. Measure the dimensions of the trapdoors to ensure they fit snugly in your chosen location.
View image
Repair of a garage door
Se você precisa reparar uma porta de garagem, aqui estão alguns passos que podem ajudá-lo: Verifique o tipo de porta de garagem: Antes de começar a reparação, verifique o tipo de porta de garagem que você possui. Portas de garagem podem ser feitas de aço, alumínio, madeira ou fibra de vidro. Cada tipo pode ter suas próprias características e exigências de reparação. Inspeção da porta: Examine a porta cuidadosamente para identificar o problema. Verifique se há danos, como amassados, arranhões, rachaduras ou buracos. Verifique também se os cabos, molas e trilhos estão em boas condições e se os parafusos e as dobradiças estão firmemente fixados. Faça as reparação necessárias: Depois de identificar o problema, comece a fazer as reparação necessárias. Se a porta estiver amassada ou com buracos, use massa de vedação ou preenchedor para repará-la. Se os cabos, molas ou trilhos estiverem danificados, você pode precisar substituí-los. Certifique-se de seguir as instruções do fabricante ou contratar um profissional qualificado para realizar as reparação. Lubrifique as peças: Lubrifique as peças móveis da porta de garagem, como os trilhos, roldanas, molas e dobradiças. O lubrificante ajudará a evitar o desgaste e a prolongar a vida útil da porta. Teste a porta: Após a reparação, teste a porta para verificar se ela está funcionando corretamente. Abra e feche a porta várias vezes para verificar se há algum problema. Certifique-se de que a porta está nivelada e que os sensores de segurança estão funcionando corretamente.
View image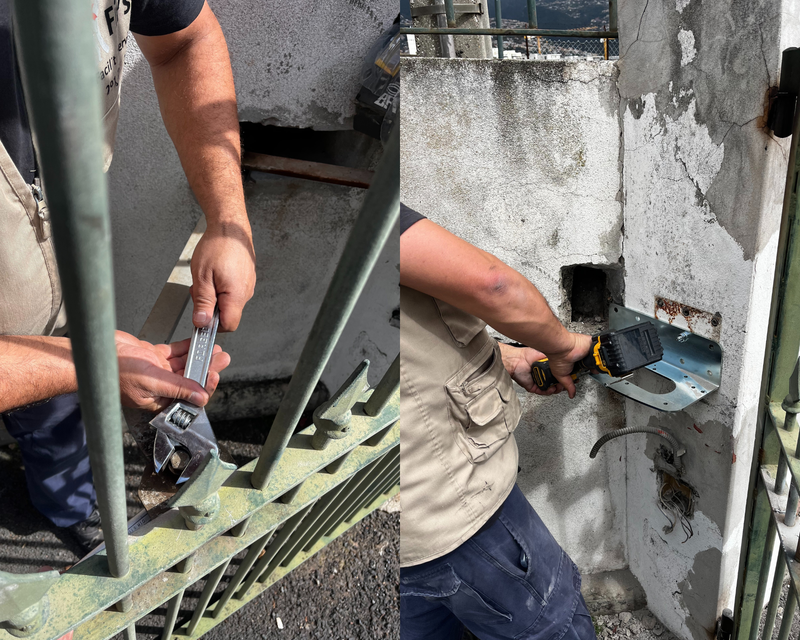
Installation and repair of a garage door motor
Fitting and repairing a garage door motor can be a complex job that requires both technical knowledge and practical skills. If you are not experienced in dealing with electrical and mechanical systems, it is recommended that you hire a professional to do the job. The basic steps for installing or repairing a garage door motor are as follows: Disconnect electrical power to the garage door. Manually remove the garage door from the track, if necessary, to allow access to the engine. Remove the old engine and mounting brackets, if any. Install the new engine and mounting brackets, following the manufacturer's instructions. Connect the electrical wires according to the wiring diagram provided by the manufacturer. Connect the motor to the garage door using the appropriate chains and cables. Test the engine to ensure it is working properly. Reinstall the garage door onto the track and retest to ensure the door is working properly.
View image
Garage door repair and installation of a warning light
Placing a garage door open warning light is an important safety measure to prevent accidents and maintain your garage. Installation usually involves attaching the light to a visible location near the garage door and connecting the light's wire to the garage's electrical system. The exact installation process may vary depending on the light model you choose. It is important to carefully follow the manufacturer's instructions and ensure that the installation is carried out safely.
Placement of mailboxes
Mailboxes must be installed in locations with easy access to postal services. It is recommended that mailboxes be made of strong material such as galvanized steel or aluminum. If you have questions about the installation or placement of your mailbox, it is advisable to contact your local postal service or the responsible authorities.
View image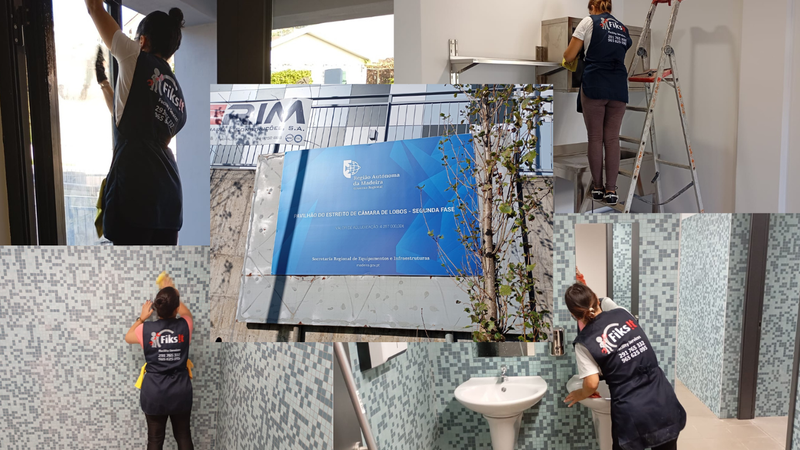
Limpeza Final de Obra- Pavilhão do Estreito de Câmara de Lobos
A limpeza pós-obra é um procedimento essencial para a preparação do ambiente, assegurando conforto e segurança. Inicialmente, é imperativo remover entulhos, como tijolos e plásticos, utilizando sacos adequados para organização eficiente. Em seguida, deve-se eliminar sujeira densa, aplicando varredura ou aspiração com equipamentos apropriados. A atenção aos vidros e esquadrias é crucial, usando ferramentas específicas para não danificá-los. Superfícies devem ser limpas minuciosamente com pano úmido e detergente neutro, assegurando a remoção de poeira e marcas. Para finalizar, uma nova aspiração ou limpeza é recomendada, a fim de garantir total higienização. É vital utilizar equipamentos de proteção, como luvas e máscaras, e evitar produtos corrosivos que possam prejudicar materiais delicados.
View image
End of Work Cleaning (FAVILLA Restaurant)
A limpeza de final de obra refere-se ao processo de limpar e organizar um local após a conclusão de uma obra ou reforma. Esse tipo de limpeza é essencial para remover a sujeira, detritos e resíduos resultantes do trabalho de construção, garantindo um ambiente seguro e habitável. Remoção de entulho: Comece removendo todos os detritos e entulhos deixados pela obra, como restos de materiais de construção, madeira, gesso, pedras, etc. Varra ou aspire o chão, remova teias de aranha, limpe superfícies com panos úmidos e retire qualquer sujeira visível das paredes, janelas e portas. Limpeza de vidros e espelhos: Utilize um limpador de vidros apropriado para limpar todas as superfícies de vidro, incluindo janelas, espelhos e portas de vidro. Limpeza de superfícies: Limpe todas as superfícies horizontais e verticais, como bancadas, pisos, azulejos, armários, portas, rodapés e luminárias. Limpeza de casas de banho e cozinha: Dê uma atenção especial à limpeza das casas de banho e cozinha. Limpeza de áreas externas: Se houver áreas externas, como pátios, jardins ou garagens, verifique se estão limpas de detritos e resíduos de construção. Lembre-se de utilizar equipamentos de proteção adequados, como luvas, máscara e óculos de segurança, especialmente ao lidar com produtos químicos de limpeza.
View image
End of work cleaning of a large house (The Factory)
End-of-construction cleaning is a very important step after completing a construction or renovation project. It is carried out by professionals specialized in post-construction cleaning, who have the knowledge and equipment necessary to carry out the task efficiently and safely. It is important to use personal protective equipment, such as gloves and masks, to ensure the safety of professionals and prevent damage to the structure.
View image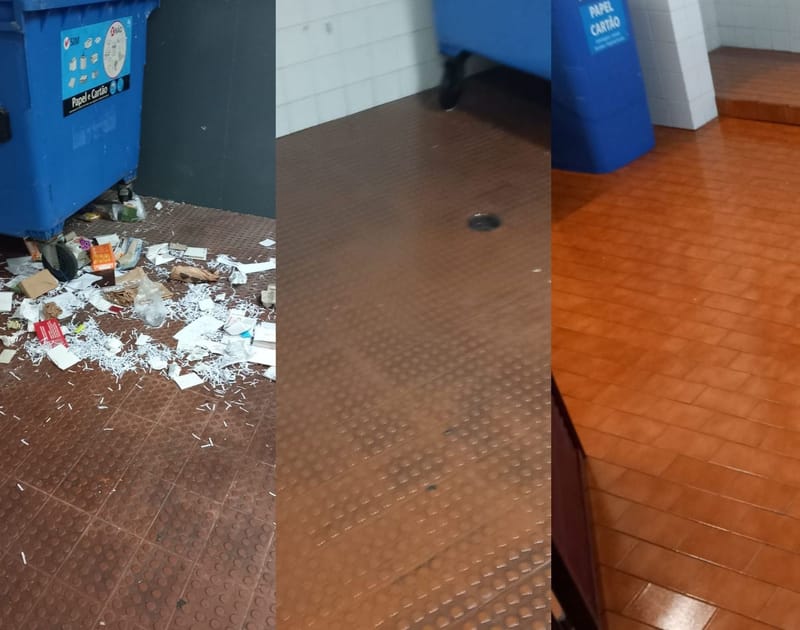
Cleaning and disinfection of common areas
Cleaning the house from garbage in a building is an essential task to maintain hygiene and health of residents and employees of the building. Some steps to carry out this cleaning are removing all accumulated rubbish, removing garbage bags, leftover building materials, debris and other objects that may be in the place, general cleaning, clean the walls, floors and ceilings with suitable cleaning products and disinfect all surfaces with appropriate solutions. Check that the equipment present is working properly and, if necessary, maintain or replace it. Waste disposal It is important to carry out proper disposal and disinfectants, separate waste into categories and take them to the appropriate disposal sites, check that waste collection is taking place regularly and that there are enough collection points to meet demand.
View image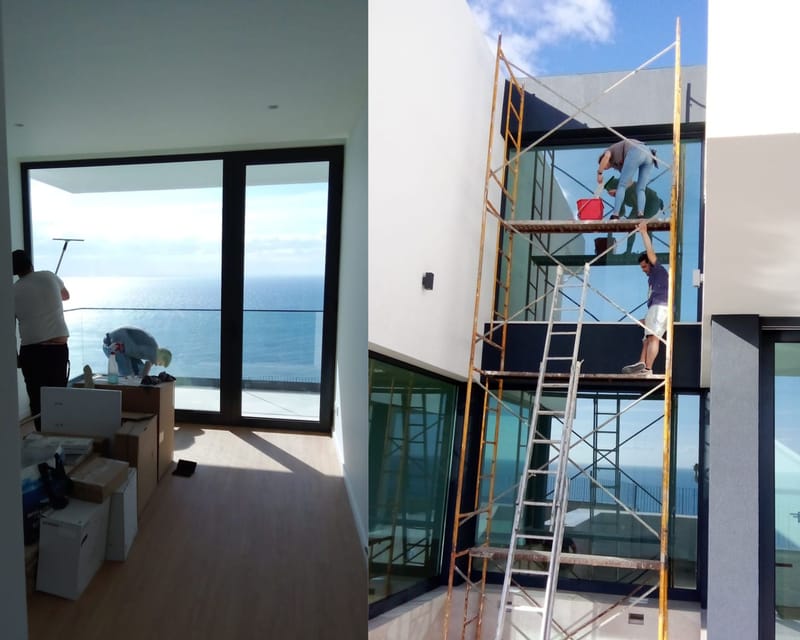
End of work cleaning
This cleaning is usually carried out by professionals specializing in post-construction cleaning, who have the knowledge and equipment necessary to carry out the task efficiently and safely. Among the stages of cleaning at the end of the work, we can highlight: Removal of debris: this is the first stage of cleaning and involves the removal of remains of construction materials, such as bricks, wood, plaster, among others/ Gross cleaning: in this stage , the thickest layers of dirt such as dust, earth and sand are removed. It is important to use personal protective equipment, such as gloves and masks, to ensure the safety of professionals/ Fine cleaning: after the coarse cleaning, a more detailed cleaning is carried out, involving the removal of stains and minor residues, such as adhesives and paint residues / Glass cleaning: finally, the windows are cleaned, both internal and external, to ensure that they are completely clean and without stains. It is important to remember that the cleaning at the end of the work must be carried out carefully to avoid damage to the structure of the property.
View image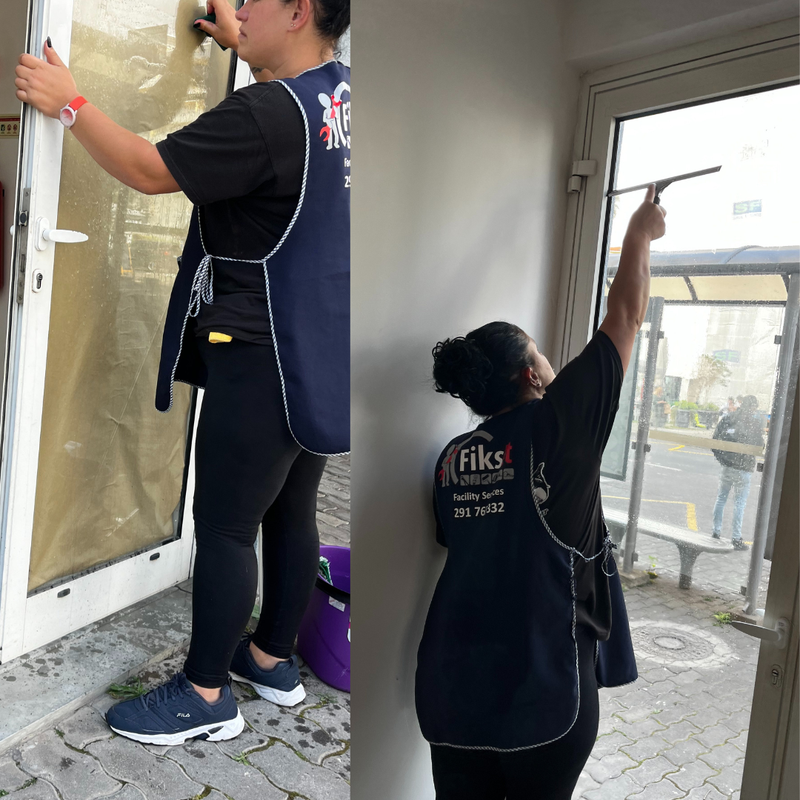
Glass Cleaning
Glass cleaning is an important task in maintaining any space. Choose the right product: There are many window cleaners available on the market, but not all are created equal. Be sure to choose a product that is safe for the type of glass you are cleaning and is effective at removing dirt and stains. Use a clean cloth: A clean cloth is essential to ensure your windows are really clean. Use hot water: Hot water is effective at removing stubborn dirt and stains. Wipe in a circular motion: Wipe the glass in a circular motion to ensure the entire surface is evenly cleaned. Remember to take the necessary safety precautions when cleaning glass at heights or in hard-to-reach places.
View image

